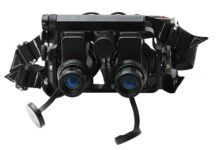
Sighting in a thermal sight scope is a critical step in optimizing its performance and ensuring precise targeting in low-light or no-light conditions. Unlike traditional scopes, thermal scopes rely on heat signatures rather than visible light, making the sighting-in process unique.
Here is a comprehensive guide to help you sight in a thermal sight scope effectively.
Understand the basics
Before diving into the sighting-in process, it is essential to understand the fundamental components of a thermal sight scope. Familiarize yourself with the reticle, adjustments for windage and elevation, and any additional features specific to your thermal scope model.
Select a stable shooting platform
Choose a stable shooting platform, such as a rifle rest or sandbags, to minimize any external factors that could impact the accuracy of your shots. Consistent stability is crucial during the sighting-in process.
Mount the thermal sight properly
Ensure that the thermal sight is mounted securely and aligned correctly with the bore of the rifle. A misaligned thermal sight can lead to inaccurate shots, so take the time to mount it precisely using the appropriate mounting tools.
Boresight the thermal sight
Boresighting is a preliminary step to get your shots on paper before making finer adjustments. Use a boresighting tool or a laser bore sight to align the thermal sight with the bore of the rifle. This helps save time and ammunition during the initial stages of sighting in.
Choose a target and distance
Select a target at a suitable distance for sighting in your thermal scope. A target at 50 yards is a common starting point, allowing you to make initial adjustments before fine-tuning at longer distances. Ensure the target has a clear thermal signature for accurate readings.
Zero the thermal scope
Fire a few shots at the target to assess the impact points. Using the thermal scope’s reticle, make adjustments for windage and elevation to bring the point of impact to the desired point of aim. Follow the manufacturer’s instructions for making these adjustments.
Record and repeat
Record the adjustments you make to windage and elevation. Continue to fire additional shots and make necessary adjustments until the shots consistently hit the target at the desired point of aim. Patience is vital during this iterative process.
Transition to longer distances
Once you’ve achieved a consistent point of impact at the initial distance, transition to longer distances to fine-tune your thermal scope further. Make adjustments as needed to maintain accuracy at various ranges, considering the specific distances relevant to your use case.
Consider environmental factors
Be mindful of environmental factors that can influence thermal signatures, such as temperature variations and atmospheric conditions. These factors can impact the thermal scope’s performance, so it’s essential to be aware of them during the sighting-in process.
Test under different conditions
To ensure the reliability of your thermal scope in diverse scenarios, conduct tests under different lighting conditions, including low-light and complete darkness. This helps validate the scope’s performance in real-world applications.
Final verification
Once you are satisfied with the thermal scope’s performance at different distances and under various conditions, conduct a final verification session. Confirm that the thermal scope consistently delivers accurate readings and precise shots according to your adjustments.
To sum up
Sighting in a thermal sight scope requires a systematic approach, attention to detail, and a thorough understanding of your equipment. By following these steps, you can optimize the performance of your thermal scope, ensuring that it delivers precision and accuracy in low-light conditions. Regular practice and familiarity with your thermal sight will enhance your shooting skills and contribute to successful outcomes in various scenarios, from nighttime hunting to tactical operations.


